# Substitute variables in templates
The Substitute Variables in Files feature is one of the [configuration features](/docs/projects/steps/configuration-features/) you can enable as you define the [steps](/docs/projects/steps/) in your [deployment process](/docs/projects/deployment-process/). This feature is available in package steps, and it allows you to inject [Octopus Variables](/docs/projects/variables) into any file.
:::div{.hint}
You can perform very complex transformations in any kind of file using this feature. We also have features tailored to [.NET XML configuration files](/docs/projects/steps/configuration-features/xml-configuration-variables-feature/) and [Structured configuration files](/docs/projects/steps/configuration-features/structured-configuration-variables-feature).
:::
## How to substitute variables in a file
The following example shows you how to use the Substitute Variables in Templates feature to provide a different login form to the different environments you're deploying to. In this example, we're deploying to a **Test** and **Production** environment.
1. Create the login variable in Octopus. From the: [project](/docs/projects) overview page, click **Variables**.
- Enter a the name for the variable, for instance, *LoginURL*.
- Enter the first value for the variable, for instance, *https://test.example.com/login*.
- Scope this value to the test environment by clicking the *Define Scope* field and selecting the test environment.
- Click **ADD ANOTHER VALUE**.
- Enter the second value for the variable, for instance, *https://example.com/login*.
- Scope this value to the production environment by clicking the *Define Scope* field and selecting the production environment, and click **SAVE**. In this example, you now have the following variables:
| Variable Name | Value | Scope |
| ----------------------- | --------------- | -------- |
| LoginURL | `https://test.example.com/login` | Test |
| LoginURL | `https://example.com/login` | Production |
2. Include the loginURL variable in the app you're deploying, by adding the variable `#{LoginURL}`. For instance:
```xml
```
3. Define the deployment process, by clicking **Process** from the project overview page, then select, **ADD STEP**.
4. Select the **Deploy a Package** step.
5. From the [Step](/docs/projects/steps) Template page, click the **Configure Features** link.
6. Check the **Substitute Variables in Templates** check-box and click **Ok**.
:::figure
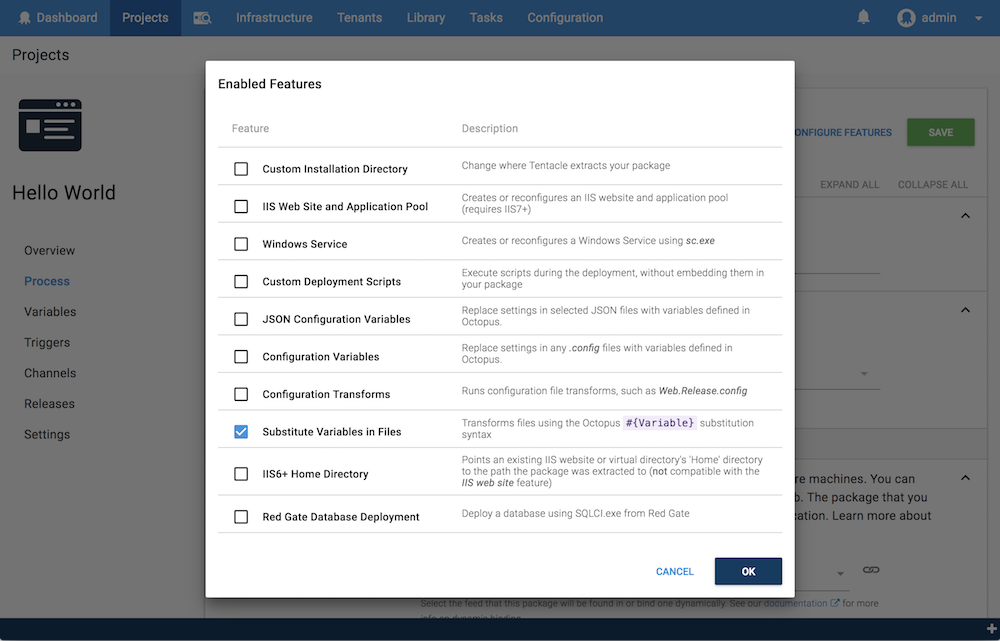
:::
When you return to your deployment process, you will see the **Substitute Variables in Templates** option has been added to the **Features** section of the deployment process.
7. Add the [step](/docs/projects/steps) details:
- Enter a name for the step.
- Select the targets where the step should run.
- Select the [package feed](/docs/packaging-applications/package-repositories/) where the [package](/docs/packaging-applications) will be available.
- Enter the [package ID](/docs/packaging-applications/#package-id) for the package to be deployed.
8. In the **Target Files** text area, enter the files, as a newline separated list, that you want to perform the variable substitution on. You need to state the full path of the file, relative to the installation directory. In our example, that includes any file that references the `{LoginURL}` variable. For instance:
```
config\app.config
```
9. If you want to specify the encoding for the transformed file, enter the encoding in the **Output file encoding** field.
The default option for Output file encoding (Detect from template) will use the Byte Order Mark (BOM) of the file to determine the encoding.
10. Add any [conditions](/docs/projects/steps/conditions) you need to specify for the step, and then click **SAVE**.
When the application is deployed to your **test** and **production** environments, each environment will include the login URL you defined for the specific environment.
From here you can use the project overview menu to continue defining your process, or click **CREATE RELEASE** to create a [release](/docs/releases) and deploy your application.
:::div{.warning}
If you include a configuration file that you are also doing a [transformation](/docs/projects/steps/configuration-features/configuration-transforms/) and [variable](/docs/projects/steps/configuration-features/xml-configuration-variables-feature/) swap on, the variable change will run under the 'substitute variables in templates' before the transformation as defined in the [package deployment feature ordering](/docs/deployments/packages/package-deployment-feature-ordering) process.
:::
:::div{.warning}
By default, **warnings** will be treated as **errors** when replacing variables in files using this feature. To override this behavior, set the variable **Octopus.Action.Package.IgnoreVariableReplacementErrors** to **True** in your project. By doing this, warnings will be treated as such and the deployment will not be marked as failed.
:::
## Examples {#SubstituteVariablesInFiles-SomeExamples}
### Swapping design elements
If you want to include a header with a different image or text in a shared layout file depending on environment it is deployed to, you can define the file and put a variable in place where you want the change to be. In this example, we've used the `#{SiteReference}` variable:
```powershell
```
### Spring boot application properties
Another common scenario is updating a Spring Boot `application.properties` file to set the web server port. In this example, we've used the #{WebServerPort} variable:
```java
server.port=#{WebServerPort}
app.version=@project.version@
environment.name=PROD
```
:::div{.hint}
The Spring expression language also uses the `#{}` syntax so you need to double encode any non-Octopus variables. i.e. `##{MyVariable}`.
:::