# Built-in Octopus repository
Your Octopus Server comes with a built-in repository which is the best choice for deployment packages. It offers **better performance** for your deployments and the most robust [retention policy](/docs/administration/retention-policies) support for cleaning up deployment packages.
The built-in feed can only be consumed by Octopus. Octopus Server provides a write-only repository; intended for hosting deployment packages only. Packages that are pushed to the Octopus Server can't be consumed by other NuGet clients like Visual Studio. If you need a NuGet feed for sharing libraries between your development projects, a separate NuGet repository is required. See [package repositories](/docs/packaging-applications/package-repositories).
## Uploading packages to the built-in repository {#pushing-packages-to-the-built-in-repository}
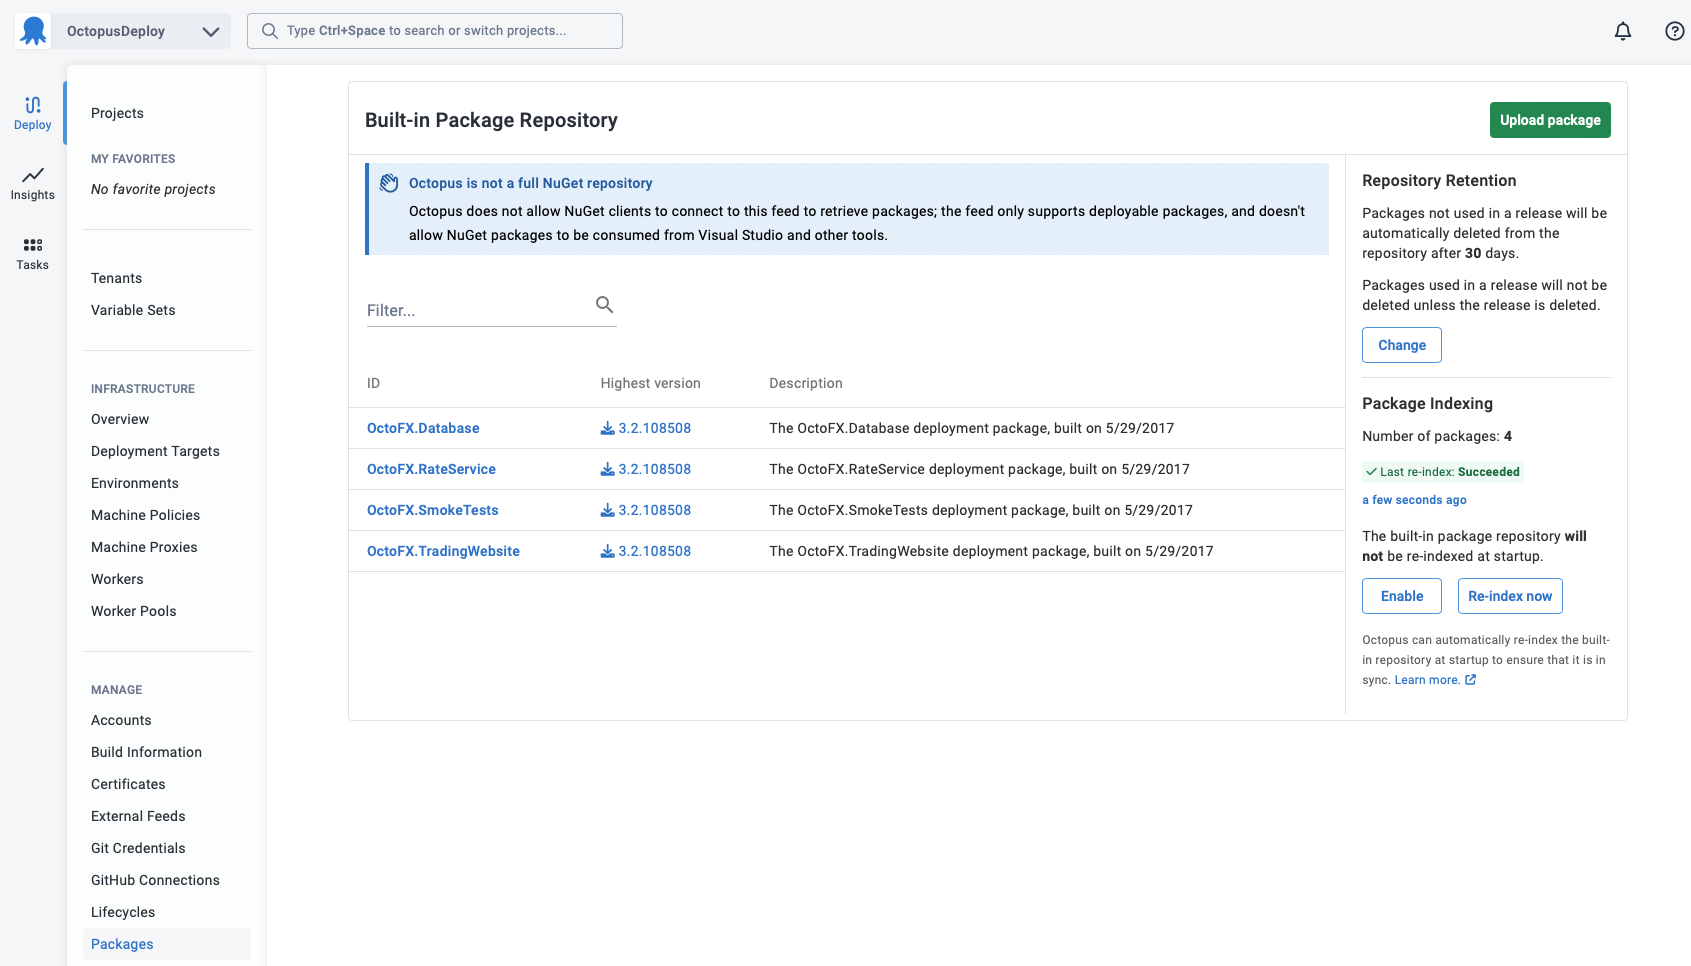
It is possible to manually upload a package file from your local machine via the Octopus Web Portal by navigating to **Deploy ➜ Manage ➜ Packages** and clicking the **Upload Package** button.
However, we recommend using a [build server](/docs/packaging-applications/build-servers) to build, test, package and automatically upload your release packages into the Octopus Deploy built-in repository.
In most cases you simply provide the build server with the URL to your Octopus Server and an [Octopus API key](/docs/octopus-rest-api/how-to-create-an-api-key) with the required permissions (see [security considerations](/docs/packaging-applications/package-repositories/built-in-repository/#security-considerations)).
In addition to manually uploading packages or using your build server, you can add, upload packages to the built-in feed in the following ways:
- [Using the Octopus CLI](#UsingOctopusCli).
- [Using the Octopus API (HTTP POST)](#UsingTheOctopusAPI(HttpPost)).
- [Using NuGet.exe push](#UsingNuGetExePush).
- [Using npm.exe, grunt or gulp](#UsingNpm.exe,GruntOrGulp).
- [Using curl](#UsingCurl).
To push packages using these methods, you will need:
1. The URL to your Octopus Server.
2. An [Octopus API key](/docs/octopus-rest-api/how-to-create-an-api-key) with the required permissions (see [security considerations](/docs/packaging-applications/package-repositories/built-in-repository/#security-considerations)).
## Using the Octopus CLI {#UsingOctopusCli}
You can upload one or more packages using the [Octopus CLI](/docs/packaging-applications/create-packages/octopus-cli), the command-line tool for Octopus Deploy. The example below will upload `MyApp.Website.1.1.0.zip` and `MyApp.Database.1.1.0.zip` to the built-in repository, automatically replacing existing packages if there are conflicts.
PowerShell
```powershell
C:\> octopus package upload --package MyApp.Website.1.1.0.zip --package MyApp.Database.1.1.0.zip --overwrite-mode overwrite
```
Bash
```bash
$ octopus package upload --package MyApp.Website.1.1.0.zip --package MyApp.Database.1.1.0.zip --overwrite-mode overwrite
```
## Using the Octopus API (HTTP POST) {#UsingTheOctopusAPI(HttpPost)}
You can upload a package via the [Octopus Deploy API](/docs/octopus-rest-api) - `POST /api/packages/raw HTTP 1.1`.
- [C# example](https://github.com/OctopusDeploy/OctopusDeploy-Api/blob/master/Octopus.Client/Csharp/Feeds/PushPackage.cs)
- [PowerShell example](https://github.com/OctopusDeploy/OctopusDeploy-Api/blob/master/REST/PowerShell/Feeds/PushPackage.ps1)
## Using NuGet.exe push {#UsingNuGetExePush}
To push a package using `NuGet.exe` you'll need the URL for the Octopus NuGet feed to use with your build server or `NuGet.exe`. To find this, open the **Deploy ➜ Manage ➜ Packages** tab of the Octopus Web Portal. The Help sidebar has options and examples of how to upload packages. The screen shows an example command-line that can be used to push packages to the feed using [NuGet.exe](http://docs.nuget.org/docs/start-here/installing-nuget). You'll need to supply the NuGet package file (`.nupkg`) and an [Octopus API key](/docs/octopus-rest-api/how-to-create-an-api-key).
:::figure
:::
:::div{.success}
If you're using a continuous integration server like TeamCity to produce packages you can use their built-in NuGet Push step. Supply the Octopus NuGet feed URL shown above and an [Octopus API key](/docs/octopus-rest-api/how-to-create-an-api-key) when prompted for the feed details.
:::
If a package with the same version exists, and you want to force the Octopus Server to replace it, you can modify the URL to include a `?replace=true` parameter:
`http://MyOctopusServer/nuget/packages?replace=true`
## Using npm.exe, Grunt or Gulp {#UsingNpm.exe,GruntOrGulp}
You can upload packages using npm.exe or using our grunt or gulp tasks. Take a look at our [guide for packaging and deploying Node.js applications using Octopus Deploy](/docs/deployments/node-js/node-on-linux).
## Using Curl {#UsingCurl}
You can upload packages using **curl**. Like all the other examples you will need your Octopus Server URL and an API Key. This will perform a POST uploading the file contents as multipart form data.
```powershell
curl -X POST https://demo.octopus.app/api/packages/raw -H "X-Octopus-ApiKey: API-YOUR-API-KEY" -F "data=@Demo.1.0.0.zip"
```
:::div{.success}
You may need to use the `-k` argument if you are using an untrusted connection.
:::
## Security considerations {#security-considerations}
To add a new package to the built-in feed requires the `BuiltInFeedPush` permission. To delete a package, or replace an existing package requires the `BuiltInFeedAdminister` permission.
For your convenience Octopus Deploy provides a built-in role called **Package Publisher** that has been granted the `BuiltInFeedPush` permission.
:::div{.hint}
**Consider using a service account**
Instead of using your own API key, consider using a [Service Account](/docs/security/users-and-teams/service-accounts) to provide limited permissions since packages will normally be pushed by an automated service like your build server. Service Accounts are API-only accounts that cannot be used to sign in to the Octopus Web Portal.
:::
:::div{.hint}
**Using built-in package repository triggers?**
If you are using [built-in package repository triggers](/docs/projects/project-triggers/built-in-package-repository-triggers) you will also require the permissions to create a release for all the relevant projects in the required environments. To diagnose issues with pushing packages used for built-in package repository triggers follow the troubleshooting guide on the [built-in package repository triggers](/docs/projects/project-triggers/built-in-package-repository-triggers) page.
:::
## Moving the location of the built-in repository {#PackageRepositories-MovingTheLocationOfTheBuilt-InRepository}
See [moving Octopus Server folders](/docs/administration/managing-infrastructure/server-configuration-and-file-storage/moving-octopus-server-folders/#move-octopus-home-folder).
## Built-in repository reindexing
Octopus automatically re-indexes the built-in repository at startup to ensure that it is in sync.
We do not recommend manually placing packages into the package store, however in certain limited circumstances (such as restoring a backup or a big package migration) it can be useful.
For most users, this will be a seamless background task. However, for some installations, this may cause performance issues. Users with `AdministerSystem` rights can disable the re-indexing task on the **Deploy ➜ Manage ➜ Packages** page.
Note that packages uploaded via the [recommended methods](/docs/packaging-applications/package-repositories/built-in-repository/#pushing-packages-to-the-built-in-repository) will still be indexed.
## Learn more
- Generate an Octopus guide for [the Octopus built-in repository and the rest of your CI/CD pipeline](https://octopus.com/docs/guides).